
Motorcycle Brake Light Test: Check Both Brake Controls Before You Join Traffic
Use this motorcycle brake light test to confirm the lamp activates from both front and rear brake controls before you ride in traffic.
Fact-checked against cited official documentation
Reviewed against Fact-checked against Motorcycle Safety Foundation guidance requiring brake-lamp activation from both brake controls and recommending lights/electronics pre-ride checks and deliberate braking signals..
Last updated October 10, 2026
Motorcycle brake light not working front or rear brake: start with a parked test
A brake light is not simply a lamp at the back of the motorcycle. It is part of the signal you give to people following you: I am slowing, I am stopping, or I need room. That makes a failed brake-light check a visibility issue before it becomes an electrical-diagnosis project.
The most useful pre-ride question is not merely, “Does the rear light come on?” It is: does the brake lamp activate when you use the front brake control, and also when you use the rear brake control? The Motorcycle Safety Foundation’s T-CLOCS checklist specifically calls for the tail/brake lamp to activate with front-brake and rear-brake application.1
That distinction matters because riders use their controls differently. One rider may rely mainly on the front brake during a normal stop; another may begin slowing with the rear brake in slow traffic, on a hill, or during low-speed control. Either way, traffic behind you should receive a brake-light signal when you apply either control. A lamp that works from only one control has passed only half the check.
This article keeps the job deliberately narrow. It explains how to observe the system safely, how to record what you see, and when the correct next step is the exact owner’s manual or a qualified motorcycle technician. It does not treat a brake-light fault as a reason to improvise wiring changes, bypass a switch, alter fuses, or perform an unverified repair.
Before every ride, use your motorcycle’s owner’s manual as the authority for its warning lamps, lighting operation, inspection instructions, and service limits. If the manual directs you to stop riding, arrange service, or use a particular inspection method, that model-specific direction comes first.
Why checking both brake controls is a safety habit
A motorcycle can slow in ways that do not automatically illuminate its brake lamp. Closing the throttle or downshifting may reduce speed without a brake-light signal. The Motorcycle Safety Foundation therefore advises riders, where possible, to flash the brake light when slowing or before stopping; it also includes lights and electronics in a pre-ride inspection.2
That guidance does not mean a flashing lamp guarantees that another road user has noticed you. It means you are giving a clearer, earlier cue while still riding defensively: checking mirrors, leaving space, choosing a lane position with an escape option, and avoiding the assumption that following traffic will react perfectly.
A two-control test supports that wider plan in several ways:
- It verifies the communication function, not just the bulb. A glowing tail lamp proves the rear assembly has some illumination. It does not prove that braking produces the brighter stop signal.
- It identifies an incomplete result. Front-control activation and rear-control activation are separate observations. “One works” is not the same as “the system works.”
- It is easier to do while parked than to discover in traffic. A simple observation before departure gives you time to choose a safer alternative if something is wrong.
- It creates a repeatable routine. Repeatability reduces the chance that you skip a critical check because the motorcycle started normally or because you are late.
- It prevents overconfident diagnosis. The test can tell you what you observed. It cannot, by itself, prove why a result occurred.
Treat the brake-light check as one layer of a broader Motorcycle Maintenance Guide, not as a substitute for maintenance, training, or your manual’s prescribed inspections. A working lamp does not confirm that brake feel, brake-fluid condition, brake pads, tires, or road conditions are suitable for riding. Conversely, a mechanical brake concern should not be dismissed because the rear lamp illuminates correctly.
What you need before the test
The goal is to make a clear observation without creating a new risk. Choose a calm, stable setup rather than trying to test the light alone on a public road or while balancing the motorcycle.
A safe test location
Park on a firm, level surface away from moving vehicles. Use the parking method and stand arrangement specified for your motorcycle. Keep the motorcycle stable, avoid loose gravel or slopes, and do not leave it where its exhaust, moving traffic, or another person could create a hazard.
If you have a helper, agree on simple roles before turning anything on:
- The rider keeps the motorcycle stable and applies one control at a time.
- The helper stands where they can see the rear lamp without standing directly behind the motorcycle’s exhaust outlet or in a traffic path.
- The helper reports only the observation: tail lamp present or absent; brighter brake-lamp response present or absent; front control result; rear control result.
A helper is useful, but not required. If you are alone, use an approach that lets you observe the rear lamp without destabilizing the motorcycle. Depending on your environment and your motorcycle, that may mean using a safe reflection or a phone positioned securely before the test. Do not hold a device while operating the motorcycle, do not lean awkwardly over it, and do not use an arrangement that makes the result hard to see.
Set the conditions first
Follow your owner’s manual for the correct ignition and lighting position for an inspection. Modern motorcycles vary: some illuminate lighting automatically with the ignition on, while others have different switch behavior or special modes. Do not assume another motorcycle works the same way.
Before judging the brake lamp, look at the lens and its surroundings. A dirty lens, bright sun, a reflective wall, luggage, or an accessory mounted near the rear can make an observation misleading. Cleanliness and physical condition matter because the MSF checklist includes checking the tail/brake lamp for a clean, tight, undamaged condition as well as its operation.1
There is no need to rev the engine, start riding, or attempt a rolling test for this check. The objective is a parked confirmation of the rear lighting response.
The two-control motorcycle brake light test
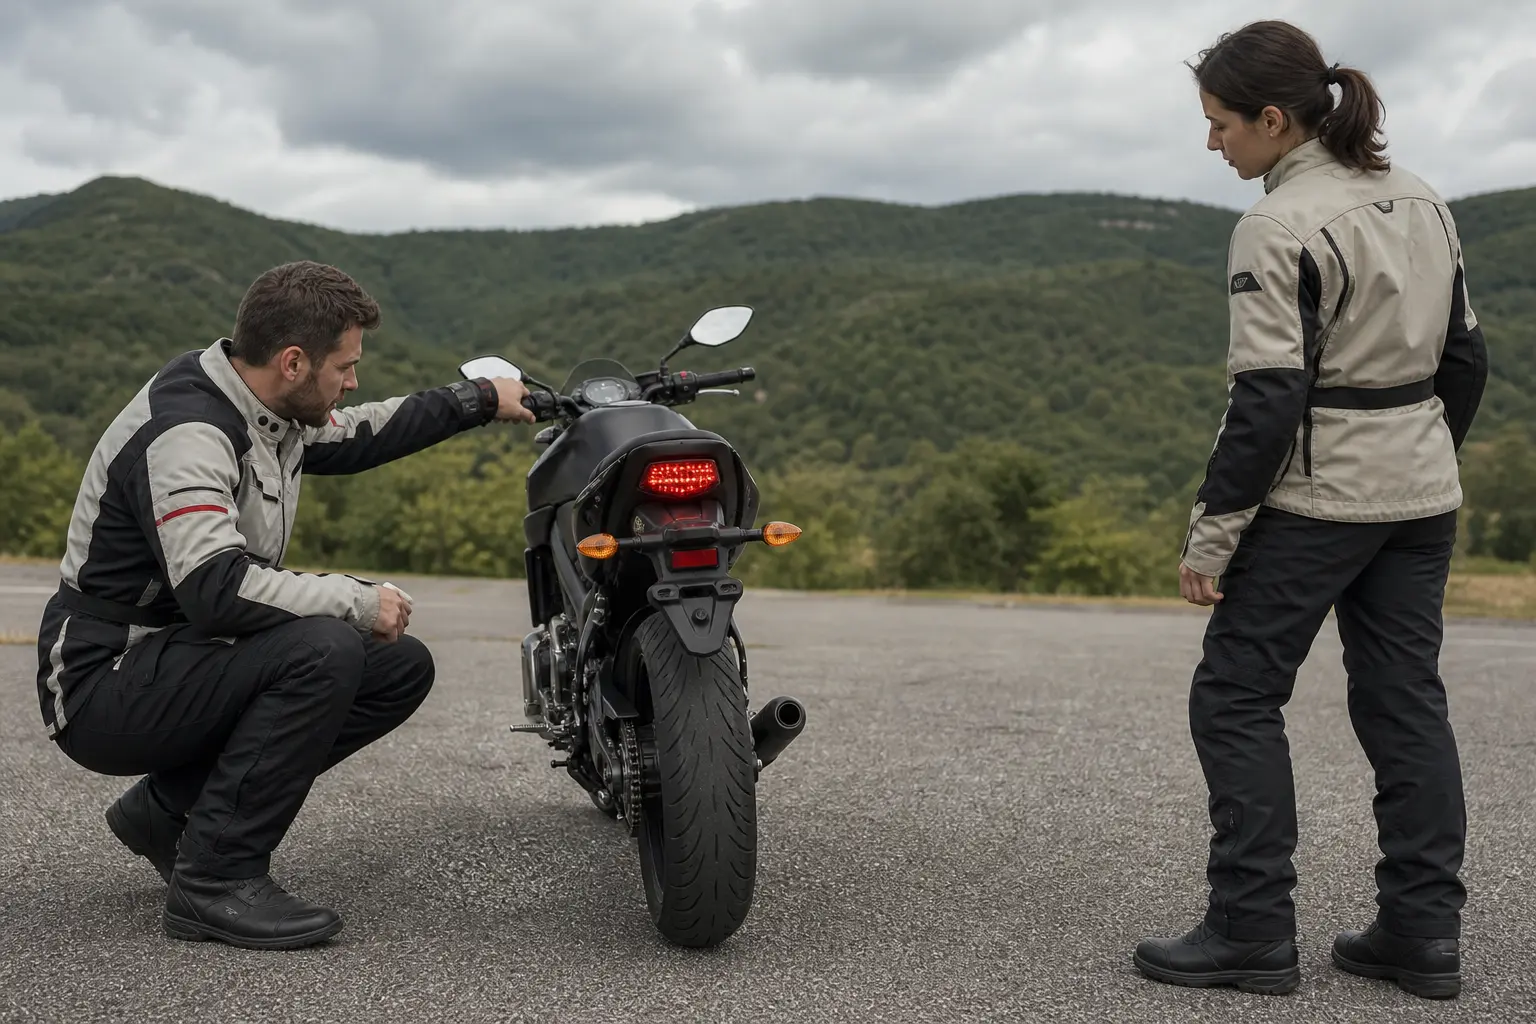
Use the same sequence every time. Separating the tail-lamp observation from each brake-control observation makes the result easier to remember and easier to explain to a technician if service is needed.
| Test step | What to observe | A passing observation | What an incomplete or failed observation means |
|---|---|---|---|
| 1. Tail lamp baseline | Rear lamp with the motorcycle in the manual-specified lighting state | The rear lamp is visibly illuminated as expected | Do not assume the brake function works; continue the check or follow the manual if the baseline is absent |
| 2. Front brake control | Apply the front brake lever while watching the rear lamp | The brake lamp visibly changes to its braking state | The front-control portion has not passed if there is no clear brake-light response |
| 3. Release front control | Let the front lever return normally | The rear lamp returns to its baseline state | A response that does not return normally needs manual-first inspection and service advice |
| 4. Rear brake control | Apply the rear brake pedal while watching the rear lamp | The brake lamp visibly changes to its braking state | The rear-control portion has not passed if there is no clear brake-light response |
| 5. Release rear control | Let the rear pedal return normally | The rear lamp returns to its baseline state | A response that remains abnormal or inconsistent is not a clean pass |
| 6. Record the result | Compare both observations | Both controls produce a clear, repeatable brake-light response | One working control does not clear the other; do not label the system fully checked |
1. Confirm the tail-lamp baseline
With the motorcycle set up according to its manual, look at the rear lamp before either brake control is applied. You are establishing a reference point. On many motorcycles, the brake function appears brighter than the tail-lamp function, but exact appearance and design vary by model. Do not try to judge compliance by comparing brightness with another motorcycle or by guessing what is “bright enough.”
The key observation is whether there is a distinct brake-lamp response when each control is applied. If you cannot clearly see a difference because of sunlight, lens condition, camera exposure, or the location, move to a safer, more suitable observation setup rather than declaring a pass.
2. Test the front brake control by itself
Keep the motorcycle stationary and stable. Apply the front brake control in the normal manner while the helper or observation method watches the rear lamp. Then release the control and observe the return to the baseline state.
Record one of three plain-language outcomes:
- Front control activates the brake lamp clearly.
- Front control does not produce a visible brake-lamp change.
- Front-control result is unclear, intermittent, delayed, or inconsistent.
Only the first is a clear pass for this portion. The other two are reasons to pause. An unclear result is not proof of a fault, but it is also not proof that the signal will work reliably in traffic.
Avoid the temptation to repeatedly pump the lever, force it, or manipulate nearby components in an effort to “make it work.” A pre-ride inspection should reveal a condition, not turn into an unsupervised repair session.
3. Test the rear brake control by itself
Return the lamp to its baseline condition. Then apply the rear brake control in the normal manner while observing the rear lamp. Release it and watch for a normal return to the baseline state.
Again, write down or remember the outcome independently from the front result. A common mistake is testing the front control, seeing the brake lamp illuminate, and assuming the rear pedal must be connected to the same successful function. The T-CLOCS checklist expressly calls for activation from both front and rear brake application.1
A rear-control result can be especially easy to miss if you are testing alone with a poor viewing angle. If you cannot see the lamp distinctly, do not convert uncertainty into a pass. Ask for help, improve the observation conditions, or postpone the ride until you can make a reliable assessment.
4. Repeat only to confirm an observation
One careful pass of each control is the core test. If a result seems inconsistent, a second observation under the same safe conditions can help confirm what you saw. Endless repeated testing does not add certainty and may distract you from the appropriate next decision: consult the manual and arrange qualified inspection.
The result should be simple enough to state in one sentence: “The brake lamp responded clearly to both controls,” or “The lamp responded to the front lever but not the rear pedal.” That clear description is much more useful than a vague note such as “rear light seems weird.”
Brake-light test checklist before joining traffic
Use this checklist as a go/no-go visibility screen. It is intentionally conservative: when you do not have a clear result, treat the situation as unresolved rather than inventing a workaround.
Clearly titled checklist: Brake-light pre-ride check
- Park on a stable surface in a place where the rear lamp can be observed safely.
- Check the exact owner’s manual for the correct lighting/ignition state and any model-specific warnings.
- Look over the rear lamp lens and mounting for obvious dirt, damage, looseness, or obstruction.
- Establish the tail-lamp baseline before applying either brake control.
- Apply the front brake control while stationary; confirm a clear brake-lamp response.
- Release the front control; confirm the lamp returns to its normal baseline appearance.
- Apply the rear brake control while stationary; confirm a clear brake-lamp response.
- Release the rear control; confirm the lamp returns to its normal baseline appearance.
- If using a helper or camera, make sure the viewing angle allowed a clear result rather than a guess.
- If either control does not activate the lamp, or the result is intermittent, delayed, or unclear, do not treat the motorcycle as ready for normal traffic riding.
- Consult the model-specific owner’s manual and arrange qualified motorcycle service when the condition is unresolved.
- Once riding, continue to use defensive spacing and mirror awareness; a working lamp does not guarantee another road user will respond.
How to interpret the result without overdiagnosing it
A strong safety check separates observation from cause. The observation is straightforward: the rear brake lamp did or did not respond when a particular control was applied. The cause may be model-specific and can involve components, settings, connections, controls, lamps, or other parts of the electrical system. That is why an exact diagnosis should come from the owner’s manual and a qualified professional rather than from a generic internet checklist.
Here is a useful decision framework.
Both controls activate the lamp clearly
This is the desired pre-ride outcome for the brake-light test. Record it mentally as a successful visibility check, then continue with the rest of your pre-ride routine.
Do not let this one pass override other safety information. A brake warning, unusual brake feel, visible leakage, damaged wiring, a warning message, or another concern still deserves the action specified by the manual. The lighting function and braking system must each be treated seriously on their own terms.
The lamp works from one control but not the other
This is an incomplete result, not a minor cosmetic issue. You may still have some brake-light operation, but you cannot count on consistent signaling whenever you use the control that did not trigger the lamp.
Do not try to compensate by promising yourself that you will use only the “working” brake control. That changes normal operation, adds mental workload in traffic, and does not address the underlying condition. It also turns a discovered pre-ride defect into an on-road experiment.
The conservative course is to refrain from normal traffic riding, consult the model manual, and arrange qualified service or transport as appropriate. If you must move the motorcycle for security or positioning, follow local requirements, the manual, and a conservative plan; do not interpret a short movement as approval to ride in traffic with an unresolved brake-light issue.
Neither control activates the brake lamp
Treat this as a no-ride condition for normal road use until the motorcycle is inspected and the manufacturer’s guidance is followed. A brake lamp that does not communicate either front- or rear-brake application removes an important cue for following traffic.
Do not bypass, jumper, alter, or substitute electrical parts based on a generic video, forum post, or another model’s diagram. Even motorcycles that look similar may have different wiring, control layouts, safety systems, or service procedures.
The result is intermittent, delayed, or unclear
An inconsistent lamp response is not a dependable response. The safest interpretation is that you do not have a verified pass.
First rule out a poor observation: glare, camera exposure, a helper standing in the wrong place, or a lens obscured by dirt can make a correct system appear questionable. If the setup is good and the result remains inconsistent, stop there. Document which control produced the problem and under what conditions, then seek manufacturer-authorized guidance or qualified inspection.
The brake lamp stays in its braking state after release
Do not assume that an always-lit brake lamp is harmless because the light is technically on. It can deprive following traffic of the change in illumination that communicates braking. It can also leave you unable to tell whether the system is responding normally.
Do not attempt adjustment or disassembly unless the manufacturer’s documentation specifically directs it and you have the competence and equipment to follow it safely. A qualified technician can evaluate the condition in the context of your particular motorcycle.
What not to do when the test fails
Electrical symptoms encourage quick theories: “It must be a bulb,” “It is probably just a fuse,” or “I can ride carefully until the weekend.” Those statements may be tempting, but the test alone does not verify them.
Avoid these shortcuts:
- Do not guess the failed component. A front-only or rear-only result is useful information, but it is not a complete diagnosis.
- Do not use a makeshift external light as a substitute for repair. Temporary ideas can create new visibility, legal, mounting, heat, or wiring hazards.
- Do not alter wiring, connectors, switches, or fuse ratings on speculation. Use manufacturer documentation and qualified assistance.
- Do not ride as though technique can replace a brake lamp. Hand signals, extra following distance, and slower speed may be helpful communication tools in some situations, but they are not a substitute for an operational required lighting system.
- Do not confuse tail-lamp illumination with brake-lamp confirmation. The brake-light response must be seen during application of each control.
- Do not ignore other brake concerns. If there is abnormal lever or pedal feel, a warning indicator, visible fluid leakage, damage, or any concern covered by the manual, stop and follow the manual’s safety direction.
Manufacturer-first guidance means starting with the exact owner’s manual, then using an authorized dealer or qualified motorcycle technician where the manual calls for service or the fault remains unresolved. It is not an admission that you have failed as a rider; it is the correct boundary between a valuable pre-ride observation and a model-specific electrical repair.
Build the test into your departure routine
The best time to remember a brake-light check is not after a close call. Link it to a departure cue you already perform: helmet on, gloves on, key on, or first walk-around. Consistency is more useful than an elaborate routine you rarely complete.
A practical sequence might look like this:
- Walk to the motorcycle and look for anything obviously changed since the last ride.
- Set up the motorcycle securely and check the lighting state described in the owner’s manual.
- Confirm the rear lamp’s baseline appearance.
- Test the front brake control.
- Test the rear brake control.
- Continue with tires, controls, fluids, chassis, stands, and the rest of the inspection appropriate to your motorcycle.
- Join traffic only after you have a clear result and no other unresolved safety issue.
The MSF’s T-CLOCS approach places lights and electrics within a broader inspection structure rather than treating them as an occasional accessory check.1 That is a helpful mindset: the brake light is one small component, but it connects to your ability to communicate with traffic behind you.
On the road, maintain that communication deliberately. If you are slowing early, be aware that engine braking alone may not trigger the lamp. When appropriate and safe, use the brake-light signal to make your deceleration more apparent, while keeping a mirror check and an escape plan. The MSF specifically encourages flashing the brake light when slowing or before stopping if possible, alongside defensive riding practices.2
How Vojo Helps
Create a recurring pre-ride task in Vojo called “Brake light: front + rear control test.” Before a commute or weekend ride, open the task in the motorcycle maintenance tracker, perform the parked two-control check, and log one of three results: pass, unclear, or service needed. If the front lever and rear pedal both produce a clear lamp response, mark the task complete and continue your normal inspection. If either result is unclear or fails, attach a short note such as “rear pedal: no visible brake-lamp response,” leave the task open, and create a service reminder so the condition is not forgotten or normalized. Download Vojo on the App Store
A final decision rule
The standard for this check is not “the back of the bike is lit.” It is a clear, repeatable brake-light response from both the front brake control and the rear brake control. If you cannot verify that result, do not turn uncertainty into a traffic ride.
Use the owner’s manual for your model, keep the observation simple, and involve qualified service when the result is anything other than a clean pass. That small pause before departure is a practical way to protect your visibility and preserve better decisions once you are surrounded by traffic.
Sources
1 Motorcycle Safety Foundation, T-CLOCS Pre-Ride Inspection Checklist.
2 Motorcycle Safety Foundation, Motorcycle Safety Awareness Month.
Quick answers
Frequently asked questions
Should a motorcycle brake light work with both the front brake lever and rear brake pedal?
Yes. The Motorcycle Safety Foundation T-CLOCS checklist says the tail/brake lamp should activate when the front brake and rear brake are applied. Test each control separately while the motorcycle is parked and stable.
My brake light works with the front brake but not the rear brake. Can I still ride?
Treat that as an incomplete safety check rather than a pass. Do not rely on changing your riding habits to compensate. Consult your exact owner’s manual and arrange qualified inspection before normal traffic riding.
Does a lit tail light prove that the brake light works?
No. A tail lamp baseline only shows that the rear assembly has illumination in that state. You still need to see a distinct brake-lamp response when applying the front control and again when applying the rear control.
How can I test the brake light alone?
Use a safe viewing method that does not destabilize the motorcycle, such as a properly positioned reflection or securely placed camera. If glare, angle, or exposure makes the result unclear, ask a helper or delay the ride until you can verify it clearly.
Why should I test the brake light if I mostly slow with engine braking?
Engine braking can reduce speed without activating the brake lamp. A working brake lamp remains important whenever you apply either brake control, and the MSF advises riders to flash the brake light when slowing or before stopping if possible.
What should I do if the brake light stays bright after I release a brake control?
Do not assume that is harmless. An always-bright lamp may fail to communicate the change that signals braking to following traffic. Follow the owner’s manual and seek qualified motorcycle service rather than attempting an unverified adjustment or wiring repair.